Tuesday, November 23, 2010

EEEEhhh! I got an early Christmas Present

 THANKS KRISTY, DAVIS, and Mr. FOSTER!!!


 The Girls Got a present of their own Giraffe Footie Jammies, and cute outfits, from my Mom and Keith. Grandpa Keith came to town for the weekend. We had lots of fun playing Wii, Watching football and hanging out. Thanks for Visiting Keith, Try to Come again soon ;-D

Rag Doll

I made a rag doll, she looks a little goofy, and I haven't painted her face yet, but it was really simple, and the girls love it.

What I used:
  • Skin toned fabric
  • Colourful cotton for dress
  • colourful cotton for leggings
  • felt for hair
  • fiber fill
  • Lots of Pins
  • Thread that matches the hair
  • Sewing machine
I got the idea for this off of the Martha Stewart Website There is an awesome tutorial and pattern, unfortunately for some buggy reason my computer won't let me open the files, so I just made it up as I went, it's not quite as cute so if you want to make one I suggest following the pattern.

I started off by cutting my Head pieces, 1 skin coloured circle for the face, 1 felt circle for the back of the head, and  hair to frame the face. I also lined the back of my head with fabric because I used cheap thin felt.

I sewed the hair to the face using a matching thread, and also cut 4 tear drop shapes out of the hair felt, added a small bit of fiber fill and stitched around the edge to make piggy tails. And sewed the dress rectangles onto the heads, Right sides facing.

I sewed long tubes for arms out of the beige, and long hockey stick shaped tubes out of my legging material. Turned them right side out, stuffed with fiber fill

I pinned the Arms, legs, and piggy tails to the right side of the doll

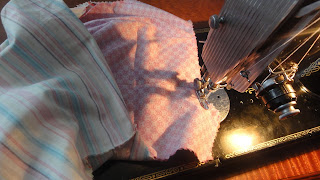
And then sandwiched them with the top piece of the dolls body

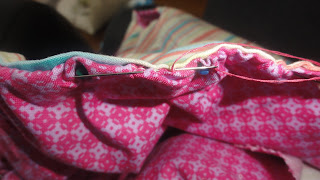
Pin all the way around making sure that the ends of the arms, legs and tails are in the seam, and the tips of the fingers and toes aren't going to get sewn in.

Start sewing above one piggy tail, back stitching at the beginning, and finish just past the second piggy tail, back stitching at the end as well. This will leave an opening of 2-3".

Ensure that all the edges are sealed, double check the neck, it took me a second shot to seal the head to the dress. Reach through the opening at the head, grab Dolly's feet and pull her right side out.

Stuff her full of fiber fill, or add some rice to her bum to weight her down, Pin the top of her head shut and whip stitch closed.

I haven't made a trip to Michaels yet to get some Fabric Paint medium, but I plan on painting her face on. I also have a doll I made before this one, she's even goofier looking, but once I paint their faces I promise to put some pictures up.


Monday, November 15, 2010

Some pics of the basement!

Bottom of the stairs pre any work being done. Also where we found bags of weed and cocaine

behind where the washer and dryer sat, before any work was done

front corner of the house the construction workers had all ready started bringing stuff in when this pic was taken

one of the two windows on the South side of our house

Our old stairs

From the top looking down

beams and rebar going up

they had to cut some of the cinderblocks because they stuck out too far

south wall

North corner, front of the house

Our stairs now! They're sideways and you need to climb it like a ladder, And see that chair post going through the centre of the stair well? Yeah, we have to build the new stairs around that. Not so much fun!

View from the other side. If we put the old stairs back how they were you'd smack your shin on that bar when you hit the 4th or 5th step :'-(

North wall front of the house, they have the beams up outside the form to hold the weight of concrete
.
They Poured the cement today!!! Now all we need to do is wait for the cement to set, then the crew will come back and take the forms away! Voila, no more crumbling walls :-D

Snowman painting

As I previously mentioned here I have a whole bunch of 1x 6 wood lying around. Sophia was working on painting her little clay car So I ran outside and grabbed a piece of wood off of the pile, gave it a quick sanding. And started painting
She wouldn't let me take a picture of her but here's a sneaky one.
Sophia's very colourful Car
I started by pouring lots of white, blues, purple, and yellow and started mixing,
I blended left to right across the wood for the sky, and down like a hill for the back ground,


Using a greyish blue I outlined a snowman

Then left it to dry

This is how Sophia's car turned out. She decided on doing all green

A few days later when Inspiration hit I went over my Snowman with white, allowing the greyblue to show through, I added arms, shadowing int the elbow crooks, and added mittens. I painted rosey cheeks and a carrot nose and drew eyes and mouth with a sharpie. I think it turned out really cute! Sorry I don't have pictures of my second night of painting. I was being lazy ;-D. I will definitely be making more of these~

Bubble Dress

I measured out a jumper that fit Annalilia perfectly

Two Pieces in the lining fabric

And two pieces in your main fabric

I added a bell shape and added 2 1/2". The more length the bigger your bubble will be.

I sewed the lining and outside fabric for the front and back together at the neck line and top of the straps

You'll have two pieces each having the lining and outside fabric right sides together attached by the neck

Sew the side seams of the outside and lining fabrics together

It should look something like this

determine which side will be the back, cut down the middle, 3"

Sew a small strip, right sides facing than flip right side out

Slip between the lining and outside fabric than sew around the back slit


Sew the arm holes


Iron a piece of interfacing into the front to add some structure (photo courtesy of Sophia ;-D)

Sew a bias, or large stitch, leaving long strings, pull to gather the fabric

fold in the edge and pin making sure the gathering is spread out evenly, and the side seams line up

Hand Stitch the hem.

Add a button

And take a picture of your teething beauty!


This Website has a pattern for a bubble dress if you'd rather print one off. I'm a "Wing it" kind of gal so I just made my own. Enjoy!